Whether you're a seasoned tradesperson, an architect looking to add intricate metal details to your projects, or a DIY enthusiast with a flair for design, mastering the jeweler’s saw can open up a new world of precision cutting. This often-overlooked tool is deceptively powerful, allowing users to create detailed curves, openings, and shapes in materials such as metal, wood, acrylic, and even bone. If you're based in the UK and keen to elevate your crafting skills, read on for expert tips and tricks that will help you wield your jeweler’s saw with confidence and accuracy.
What is a Jeweler’s Saw?
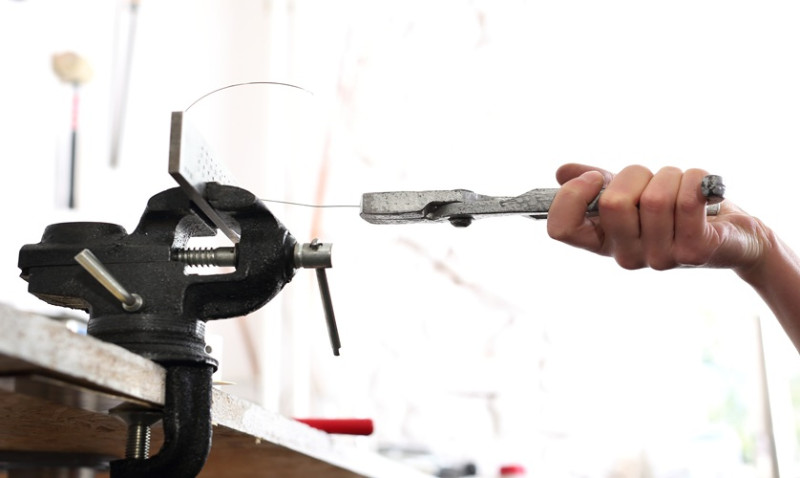
A jeweler’s saw is a fine-toothed saw housed within a U-shaped metal frame. It allows artisans and hobbyists to make extremely precise cuts in a variety of materials. It’s frequently used in jewellery making, model building, and even furniture detailing. Unlike traditional saws, a jeweler’s saw accepts thin, interchangeable blades that can be threaded through small drilled holes to make interior cuts.
The tool might look delicate, but it's capable of producing intricate work that a jigsaw or band saw simply can't achieve. Its simplicity is its power — no need for electricity or bulky machinery, just your hand and a steady pace.
Selecting the Right Blade
Choosing the correct blade is crucial for professional results. Jeweler’s saw blades come in varying sizes denoted by numbers — the higher the number (such as 8/0), the finer the blade, which is best for intricate, detailed work on thinner materials like fine metals. Coarser blades (such as number 2 or 4) are better suited for thicker stock like brass, copper or wood.
Here's a helpful reference to determine the appropriate blade size:
| Blade Size | Best For | Material Thickness |
|---|---|---|
| 8/0 | Ultra-fine detail work in thin metal sheets | Below 0.5mm |
| 2/0 | General fine detail work | 0.5mm – 1mm |
| 2 | Wood and thicker non-ferrous metals | 1mm – 3mm |
Always stock multiple sizes if you're working on a range of materials. It’s also good practice to have spares on hand — jeweler’s saw blades are thin and prone to snapping with pressure or misalignment.
Proper Saw Tension is Key
Blade tension can make or break your cutting experience. If the blade is too loose, it will bend and catch mid-cut, making it nearly impossible to cut accurately and increasing the likelihood of breakage.
To get the correct tension, insert the blade ends into the saw frame while it's slightly compressed. Once you release it, the frame should stretch the blade taut. A properly tensioned blade will give a high-pitched "ping" when plucked gently with your fingernail. Test this before every use, especially if you're swapping blades during a session.
Position and Posture Matter
Using a jeweler’s saw efficiently requires more than good handwork — your whole posture plays a role. Whether you’re seated at your kitchen bench or a dedicated workshop in Manchester, positioning yourself correctly helps control each stroke.
Sit with your back straight and both feet flat on the floor. Rest your material securely on a V-board (or bench pin) attached to the edge of your worktable. Your saw should move vertically, just like a sewing machine needle. Keep your arms relaxed and your elbows close to your body to reduce fatigue and maximise control.
Use the Saw, Don't Force It
Let the teeth do the work! One of the most common mistakes beginners make is forcing the saw through materials. This not only wears down the blade quickly but also leads to jagged, uneven cuts. Saw in a steady, up-and-down motion with minimal pressure. Think of it like slicing a cake rather than hacking at a log.
Always keep the saw moving on the downstroke — when you apply force on the upstroke, tension increases on the blade and could cause a break. If you feel resistance, stop, back up a little, and realign before proceeding.
Mastering Curves and Corners
Curved and interior cuts are where a jeweler’s saw truly shines, but they require finesse. To navigate curves without snapping blades, use a technique called "spot sawing." Instead of turning the saw, keep it vertical while gently rotating your material.
If you're cutting out a shape from the centre of a sheet, start by drilling a small pilot hole inside your desired area. Thread the saw blade through the hole and secure it in the frame. From there, begin your cut slowly, following your marked design. Re-centre yourself regularly to maintain cutting leverage.
Lubrication for Longer Life
Saw blades benefit greatly from a bit of lubrication. Using a product like beeswax or synthetic lubricants helps reduce friction and heat, letting the blade glide more smoothly through the material. This not only prolongs the life of the blade but also results in cleaner cuts.
If you’re cutting metal, this step is especially important. Apply a small amount of lubricant directly to the blade intermittently during longer cuts. For woodworking or softer materials, this may be optional, but it's still worth trying to see if your results improve.
Keep Your Workspace Organised
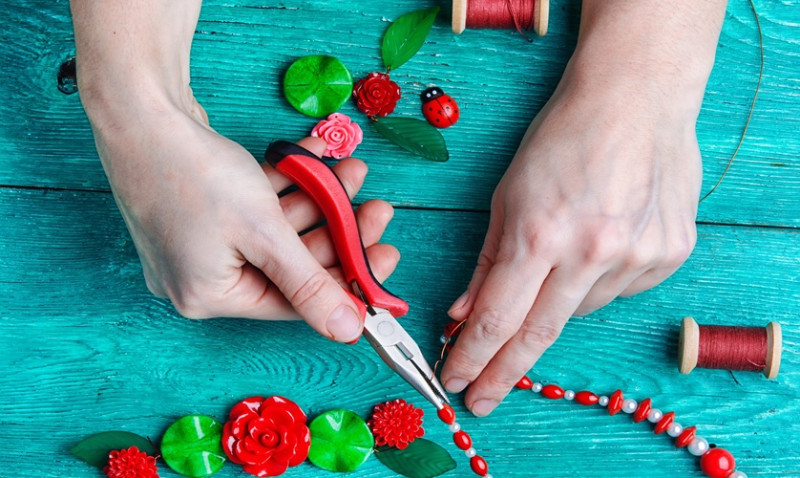
A cluttered space leads to broken blades and frustration. Try to keep frequently used tools such as pliers, files, extra blades, and your V-board within arm’s reach. Use a magnetic tray or cloth pouch to collect snapped blades safely rather than letting them scatter.
Lighting is another crucial factor. Use bright, focused lighting positioned above your workspace and slightly to your dominant side. Good lighting helps reduce eye strain and makes detailed sawing more accurate, particularly for small details or intricate custom patterns.
Practice with Templates
If you're just beginning or looking to improve your precision, print or hand-draw sawing templates on paper and adhere them to scrap material using spray adhesive or double-sided tape. This gives you practice cutting along lines and navigating tricky shapes without pressure.
Mistakes are inevitable, especially early on, so practising on copper, brass, or thin plywood is a low-cost way to get comfortable with the tool before moving on to silver, aluminium, or more valuable materials.
Final Thoughts
A jeweler’s saw might seem like a niche tool, but its precision and versatility make it a must-have for anyone serious about design, model making, or custom interiors. Whether you're fitting a delicate brass inlay in a timber surface or adding custom brass hardware to cabinetry, mastering this tool gives your projects a bespoke quality that mass-produced elements lack.
With the right technique, posture, and accessories, you'll transform from cautious beginner to confident sawing expert in no time. So the next time you spot some metal offcuts or an intriguing piece of driftwood — grab your saw and let your creativity take shape.

Trending articles
- How to Get More Jewellery Work in Your ... Feb 2026
-
 Tips and Tricks for Jewelry Business ...
Oct 2025
Tips and Tricks for Jewelry Business ...
Oct 2025
-
 3 Tips for Using a Jeweler's Saw ...
Oct 2025
3 Tips for Using a Jeweler's Saw ...
Oct 2025
-
 Mastering Jewellery Markets: Top Tips ...
Sep 2025
Mastering Jewellery Markets: Top Tips ...
Sep 2025
-
 Jewelry Making Tips: Control Your ...
Aug 2025
Jewelry Making Tips: Control Your ...
Aug 2025
-
 Jewelry Making Tips & Hacks You Have ...
Aug 2025
Jewelry Making Tips & Hacks You Have ...
Aug 2025

Related Articles