Whether you're a beginner exploring the world of handmade jewelry or a seasoned artisan looking to elevate your skillset, this guide has something for you. In this sixth instalment of our jewelry-making tips and hacks series, we're diving deep into clever techniques, smart tools, and best practices to make your creative journey smoother, more efficient, and even more enjoyable.
As more people across the UK turn hobbies into profitable side hustles, mastering the art of jewelry crafting can be as rewarding as it is profitable. From DIY enthusiasts redesigning their homes to professionals in design, architecture or trade, this craft offers limitless possibilities for customisation and expression. Let’s unlock the secrets of smarter jewelry fabrication that saves time, reduces waste and helps you create pieces that truly shine.
1. Use Baby Powder to Untangle Chains
Few things frustrate a jewelry maker more than tangled chains. Thin, delicate chains often end up in impossible knots, wasting precious time. But there's a simple and safe solution waiting in your bathroom — baby powder.
Sprinkle a small amount of baby powder over the chain and gently massage it through the knots. The powder helps reduce friction, allowing the twisted links to slide over each other more easily. This trick is especially useful when dealing with inherited or bulk-purchased vintage chains.
Once untangled, simply wipe the chain clean with a soft, dry cloth or use a gentle cloth dampened with mild soap and water to remove any powder residue.
This method not only works for necklaces but also fine link bracelets and anklets. It’s a time saver and reduces the risk of breakage caused by forcefully pulling on delicate materials.
2. Create a Bead Stopper with Household Items
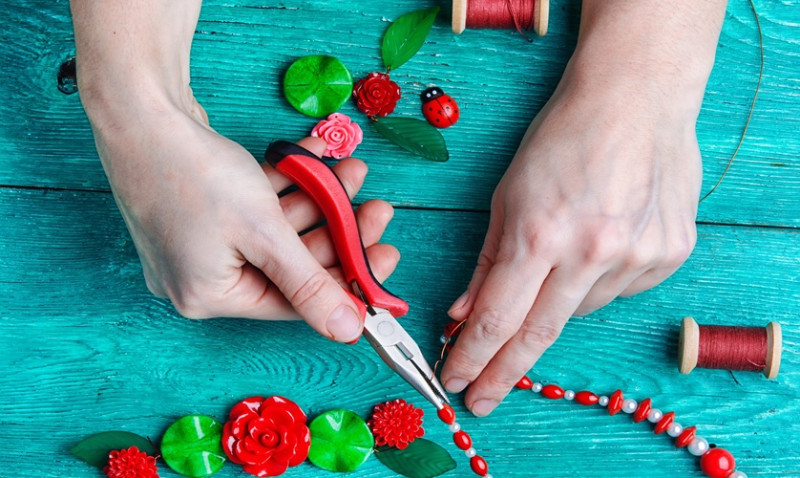
Beading can be a meditative and creative process until the moment you accidentally spill your masterpiece in progress. Prevent beads from slipping off wires or threads by creating a quick and easy bead stopper.
While there are commercially available bead stoppers, a simple DIY version can be made using items you likely already have at home. Paper clips, rubber bands, or even small hairpins bent into a figure-eight shape can serve as effective temporary stoppers.
Simply clip the makeshift bead stopper onto one end of your wire or thread before starting your design. This manageable trick prevents slip-ups and spilled beads while keeping your work organised and frustration-free.
These emergency bead stoppers are perfect for on-the-go crafters or when you're taking your work between job sites, workshops, or creative retreats across the UK.
3. Master the Art of Colour Harmony with a Bead Colour Wheel
Choosing the right colour combinations is key in jewelry design, especially when designing for clients with specific aesthetics — a common scenario for architects and interior designers seeking complementary accessories for decor schemes.
A bead colour wheel helps you match hues that either contrast effectively or blend harmoniously, depending on the desired effect. This strategic approach to colour not only enhances the look of your jewelry but also gives it a professional edge.
For example, using complementary colours like deep blue lapis with gold accent beads creates striking contrast. Alternatively, softer analogous colours — such as rose quartz with peach or nude tones — evoke elegance and calm, perfect for formal pieces.
You can download printable colour wheels or purchase ones specifically made for jewelry design from trade suppliers across the UK. They can be used as an easy reference for both visual harmony and emotional resonance with your designs.
4. Use Nail Polish for Metal Protection and Stone Adhesion
Nail polish isn’t just for your fingers — it’s a surprisingly versatile tool in a jewelry maker’s toolkit. Clear nail polish can protect metal pieces from tarnishing and help secure small stones or beads in settings.
Apply a thin layer of clear polish on metal findings like brass, copper, or nickel before using them. This forms a barrier against oxidation and skin oils, preserving the metal's shine and reducing allergic reactions for sensitive users.
In addition, if you’re working with small cabochons or rhinestones that are prone to slipping out, a dab of clear nail polish along with glue offers extra hold without excessive mess.
This hack is especially helpful when working on custom orders or small batch collections where durability and presentation are key to customer satisfaction.
5. Transform Broken Jewelry Into Fresh Creations
Every jewelry maker has a collection of unused components — lonely beads, broken clasps, or out-of-style pendants. Rather than discarding these items, consider upcycling them into new designs.
Take apart broken pieces and salvage what you can: clasps, gemstones, ear hooks, and decorative beads all offer value. Mix and match components with new materials to create unique, boutique-level pieces with a sustainable twist.
This is an especially valuable tip for UK makers interested in circular design principles and waste reduction. Many customers and clients, from interior designers to eco-conscious consumers, value the story and sustainability behind their purchases.
Offering a “revamp” service to repurpose client-supplied jewelry creates a personalised experience and adds an exclusive edge to your business model. It’s also an excellent way to hone your design flexibility and problem-solving skills.
6. Organise Your Supplies Like a Pro with This Storage Hack
Nothing halts the creative process faster than a cluttered workspace. Professional-level organisation might seem time consuming, but it can dramatically increase your productivity and output.
One of the smartest hacks for UK-based jewelry makers is using transparent tackle boxes or stackable drawer units to separate beads, wires, findings, and tools. You can find these affordably at hardware stores, trade supply shops, or even high-street retailers like B&Q or Wilko.
Label each compartment clearly using waterproof adhesive labels and arrange items by colour, material, or size. This allows for quick access during production and helps maintain inventory levels with ease, which is crucial if you’re managing multiple client projects.
Bonus tip: Store your silver findings in airtight pouches with anti-tarnish strips to keep them brilliant and reduce polishing work over time.
7. Make Adjustable-Length Necklaces Without a Clasp
This trendy design hack is not only convenient for wearers but also simplifies production. Cord necklaces made with sliding knots allow for adjustable lengths without the need for metal clasps — ideal for customers with metal sensitivities or minimalist preferences.
Using a quality waxed cotton, leather or nylon cord, you can tie two sliding knots at either end of your design that move to adjust necklace length. This style works well in casual boutiques or with beach-inspired or bohemian lines.
It’s also great for male customers who prefer a rugged aesthetic and for those looking to layer multiple necklace lengths effortlessly. This technique allows for quick production batches and fewer components needed —keeping costs down while increasing versatility.
For UK craft markets and Etsy sellers, including an adjustable necklace option can be a selling point that appeals to a broader customer base.
Your Next Step: Make It Your Own
Jewelry making is more than just crafting – it’s storytelling through design. With these practical tips and creative hacks, you’ll not only save time and frustration, but elevate your work to true artisan level. Keep experimenting, seek out sustainable practices, and most importantly, let your unique perspective shine through each piece.
Whether you’re creating at home in Manchester, sourcing supplies in London, or selling at artisan fairs across the Midlands and Scotland – your jewelry journey is only just beginning. Tap into new techniques, organise like a pro, and don’t be afraid to break the rules as you make magic with metal, beads, and creativity.

