Dreaming of launching your own jewelry line or simply looking to dive deep into the world of metal, gems, and intricate designs? Setting up a well-organized, functional, and inspiring home jewelry studio is the first step. Whether you're a hobbyist, a professional jeweler, a DIY enthusiast, or a design-savvy creative from the UK, these tips will help you build the workspace you need to bring your pieces to life—right at home.
1. Choose the Right Space
The location of your in-home jewelry studio matters significantly. Ideally, opt for a space that is quiet, well-ventilated, and has good natural light—think a spare bedroom, converted garden shed, loft space, or even a corner in your living room adapted for creative work.
If you’re dealing with small living quarters (as is common in UK flats), consider using vertical space for storage and collapsible furniture to maximise functionality while saving room.
Noise and mess can become issues, especially when torch work or metal cutting is involved. If you're working in a shared space, try to isolate your studio with partitions, curtains, or room dividers to contain debris and minimise disruption.
2. Make the Most of Natural and Artificial Lighting
Lighting is crucial for detailed work such as wire wrapping, soldering, and stone setting. Try to set up your studio near a window where you can benefit from daylight, which reduces eye strain and provides truer color perception.
Supplement this with task lighting, such as articulating LED lamps. Look for adjustable arm lamps with daylight bulbs (about 5000K color temperature) to mimic natural light on cloudy UK winter days. Overhead ambient lighting can also help prevent shadows and support extended work hours.
3. Invest in a Solid Workbench
Your workbench forms the heart of your studio. A jewelry bench differs from a traditional table—it’s typically higher and features a semicircular cutout to bring your body closer to the work for precision tasks.
If you're on a budget or just starting out, you can convert a sturdy wooden desk or kitchen counter into a functional jewelry bench with some modifications. Attach a bench pin, a firebrick surface for soldering, and drawers or tool panel organizers to keep tools accessible.
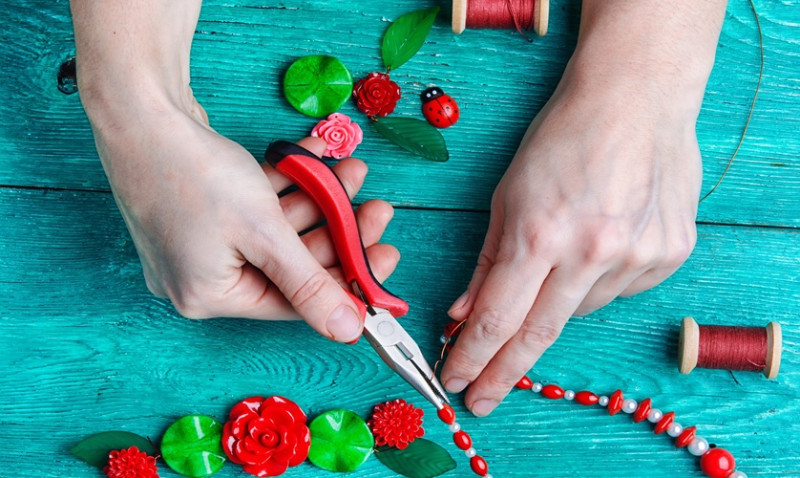
4. Organise Your Tools Efficiently
Having the right tools organised and accessible dramatically improves productivity. For UK users with limited room, wall-mounted pegboards or magnetic strips can free up surface space. Label drawers or use clear stackable boxes to categorize pliers, files, hammers, and findings.
Your core jewelry-making toolkit might include:
- Pliers (round-nose, chain-nose, flat-nose)
- Wire cutters and flush cutters
- Files and sanding sticks
- Saw frame and blades
- Bezel pushers and burnishers
- Ring mandrel and ring sizer
Shelving and drawer units from UK retailers like IKEA, B&Q and Wickes can be excellent for affordable and adjustable storage.
5. Safety Should Come First
Working from home might feel casual, but jewelry work can be risky—especially when using a torch, acids, or polishing compounds. Always put safety at the forefront. Install a fire extinguisher and ensure you’re working in a space with proper ventilation, especially when soldering.
Use a fume extractor or a soldering hood if you're frequently using flux and pickle solutions. Don’t forget safety gear: wear goggles, dust masks, and use heat-resistant gloves when necessary. And always keep a first-aid kit nearby in case of minor accidents like cuts or burns.
6. Create Zones for Different Tasks
Divide your studio into functional areas where specific tasks take place—this could include zones for designing/sketching, making/soldering, cleaning/polishing, and packaging/shipping if you sell your work online. This helps in maintaining order and reduces the chance of cross-contamination between materials and tools.
For example, store soldering gear and chemicals away from soft metals to avoid corrosion. Set up a polishing station close to a vacuum or near a window to contain dust and debris, especially important in flats or terraced homes with little ventilation.
7. Keep Your Materials Well-Sorted
Jewelry-making requires many small findings, beads, wire rolls, and precious stones. Use transparent jars, tackle boxes, or drawer organisers to sort by metal type, colour, or size. Label everything and consider using stackable plastic trays available from UK craft stores like Hobbycraft or The Range.
Be sure to separate your scrap metals like silver and gold, as these can be recycled or sold back to precious metal dealers for reuse.
8. Set Up a Soldering Station
Set aside a heat-safe area in your studio for soldering. Use a ceramic tile or soldering block as your base, and invest in a good-quality butane torch (such as the ones from Dremel or CooksonGold). A tripod and mesh screen can help you solder from below for specific techniques.
Ventilation is key—if you're indoors, use a small desk fan to push fumes toward a window, or better yet, a proper fume extractor made for hobbyists. Keep all flammable materials away from this station, and never leave a lit torch unattended.
9. Consider Noise and Disturbance
Jewelry work can be noisy. Hammering metal, using a rotary tool or drill, and tumbling pieces can disrupt others in your household or your neighbours, especially in flats or semi-detached UK homes.
Use vibration mats to dampen noise transfer and try to limit loud tasks to daytime hours, especially if you're in a rented or shared property. For sensitive tasks, use a rubber block or sandbag to reduce sound while hammering or texturing metal.
10. Work in Ergonomic Comfort
It’s easy to get immersed in your project and forget about your posture—until your back or neck starts to hurt. Choose a chair with lumbar support and make sure your bench is at the right height so you aren't bending too low or raising your arms excessively.
Your work surface should ideally sit at elbow height when you’re seated. Use anti-fatigue mats for standing tasks, especially when polishing or sawing. Don’t forget to stretch or take breaks—especially during lengthy working sessions.
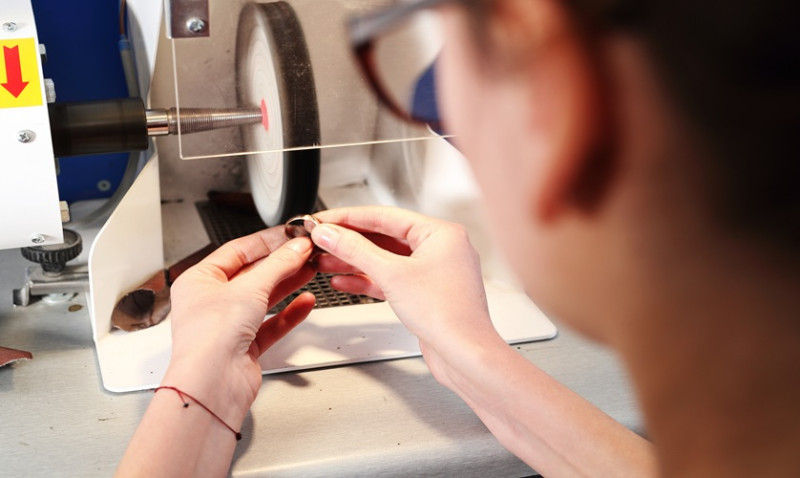
11. Add a Dedicated Polishing Station
Polishing can be messy, throwing dust and polishing compound into the air. Consider setting up a table-top polishing motor or flex-shaft tool with a bench-mounted dust collector. A cloth shield can also help mitigate flying debris.
For beginners or DIYers, a Dremel rotary tool with a polishing attachment works well. Protect surrounding areas with a plastic sheet or acrylic barrier and always wear eye protection when using polishing tools.
12. Incorporate Flexible Power Sources
With various tools like flex shafts, soldering irons, tumbler motors, and lamps, you’ll need ample power supply. Equip your studio with multi-socket surge protectors, ideally wall-mounted above work height for easy plugging and unplugging.
For outdoor studios or garden shed setups, consider running a waterproof extension cable from the main house and use outdoor-rated sockets. Always consult an electrician for any permanent installation—especially essential under UK electrical standards (BS 7671).
13. Use Technology to Streamline Your Craft
From 3D design programs to simple spreadsheets for material costs, technology can elevate your work. Explore beginner-friendly CAD software like Rhino Gold or TinkerCAD for testing out design concepts before fabricating them physically.
You can also use a label printer for organizing materials, Google Sheets to track inventory and cost of goods, or Etsy, Shopify, and Instagram to market your creations directly.
14. Protect Your Work and Valuables
If working with precious metals or gemstones, consider investing in a lockable cabinet or safe. Keep insurance up to date and notify your home insurance provider that you're running a small home studio—especially important if you're selling or attracting clients.
Use separate containers to track scrap, offcuts, and valuable findings. Some UK artists even bank unused gold and silver, securing it for future use or resale.
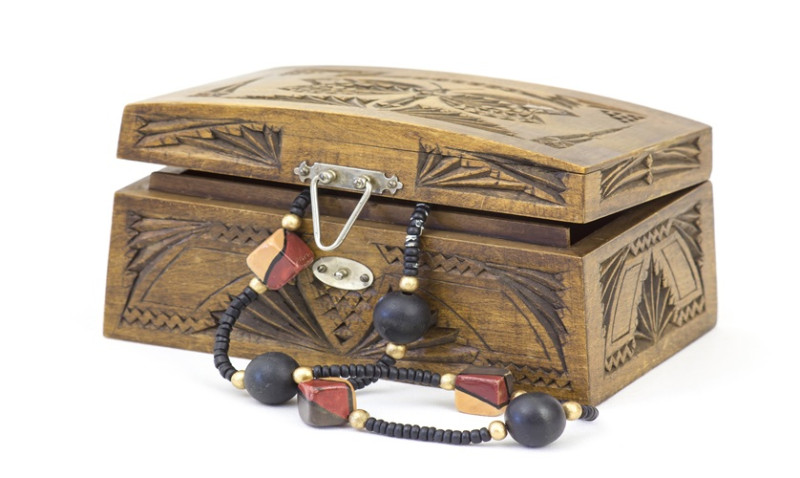
15. Add Your Personal Creative Touch
Your workspace should both inspire and renew your creativity. Add personal touches such as mini mood boards, gemstone artwork, vintage jewelry displays, or framed sketches. Displaying finished pieces also doubles as motivation to keep going.
Ambient additions like a Bluetooth speaker for background music or a calming essential oil diffuser can do wonders in making the studio feel like your personal sanctuary while you work.
Jewelry Studio Setup Essentials
| Category | Essentials | Recommended UK Retailers |
|---|---|---|
| Furniture | Workbench, ergonomic chair, shelving units | IKEA, B&Q, Argos |
| Lighting | Task lamps, daylight bulbs, overhead lighting | Toolstation, Screwfix, Amazon UK |
| Hand Tools | Pliers, saws, files, mandrels | Cooksongold, Eurotool (via UK distributors) |
| Safety | Goggles, gloves, fume extractor | RS Components, Machine Mart UK |
| Tech Tools | Label printer, CAD software, rotary tool | Currys, Amazon UK, Dremel UK |
Final Thoughts
Setting up a home jewelry studio takes thoughtful planning, a balance of creativity and practicality, and a willingness to invest in your artistic future. With these 25+ tips, UK-based creators can design a personalized, safe, and fully functional space tailored to their workflow—and budget.
Whether you're sawing your first pendant or fulfilling custom engagement ring orders from your converted loft, these insights will help ensure that your studio becomes a place where you feel empowered to create and push technical boundaries—all from the comfort of your home.

Trending articles
- How to Get More Jewellery Work in Your ... Feb 2026
-
 Tips and Tricks for Jewelry Business ...
Oct 2025
Tips and Tricks for Jewelry Business ...
Oct 2025
-
 3 Tips for Using a Jeweler's Saw ...
Oct 2025
3 Tips for Using a Jeweler's Saw ...
Oct 2025
-
 Mastering Jewellery Markets: Top Tips ...
Sep 2025
Mastering Jewellery Markets: Top Tips ...
Sep 2025
-
 Jewelry Making Tips: Control Your ...
Aug 2025
Jewelry Making Tips: Control Your ...
Aug 2025
-
 Jewelry Making Tips & Hacks You Have ...
Aug 2025
Jewelry Making Tips & Hacks You Have ...
Aug 2025

Related Articles